Note: Photographers’ Friday is a weekly blog series directed toward professional photographers, and in some instances, serious amateur photographers. All Photographers’ Friday blog posts will assume that readers have a basic working knowledge of digital SLR cameras, but if you’re left with questions or don’t understand any of the information, don’t hesitate to ask. We love e-mails!
—
So last week when we talked about off-camera flash for outdoor portraits, we promised we would address our reception lighting setup this week. And now it’s this week. So let’s dive in.
On-camera flash, we decided long ago, isn’t our preferred method of lighting, so we needed an alternative that would 1.) properly illuminate the subjects, 2.) maintain the elegant ambiance of a wedding reception, and 3.) make our subjects look good. Since then, we’ve spent a lot of time learning about how other photographers light receptions and practicing our own lighting setup — which, as I mentioned last week, is modeled after Zach & Jody‘s reception setup. And we love it. Because we get images like this one, from Claire’s father-daughter dance.
35mm f/1.4G, 1/250 sec @ f/5.0, ISO 4000
Our setup itself is actually a rather simple three light system: We use two kicker lights and one off-camera stand light.
The kicker lights, which provide backlight during the reception, are LumoPro LP 160 speed lights on heavy-duty, 9-foot flash stands. We like to use heavy-duty stands because they have a wider base and are less likely to tip if a guest or staff member bumps into or kicks them during the night. The lights themselves are bare (but gelled if the venue has incandescent lighting), and placed off to the sides of the dance floor. We point the lights at approximately 30 degrees toward the center of the dance floor at a height of seven to eight feet.
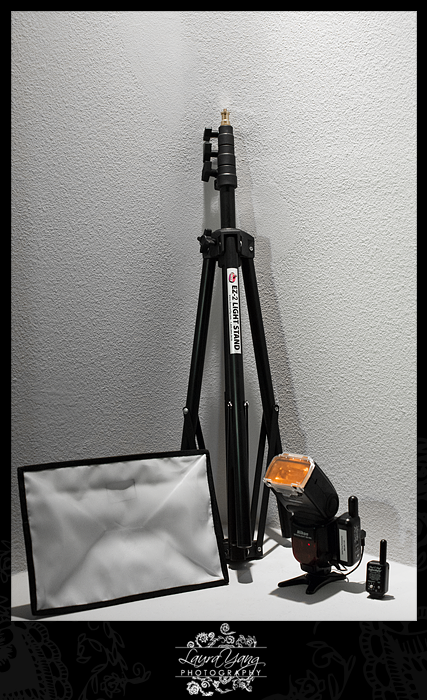
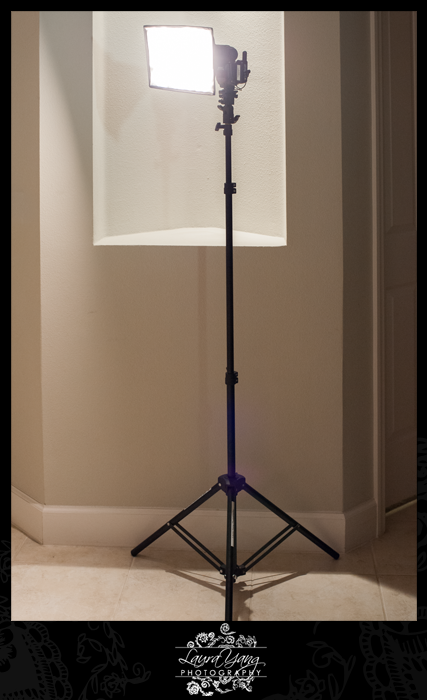
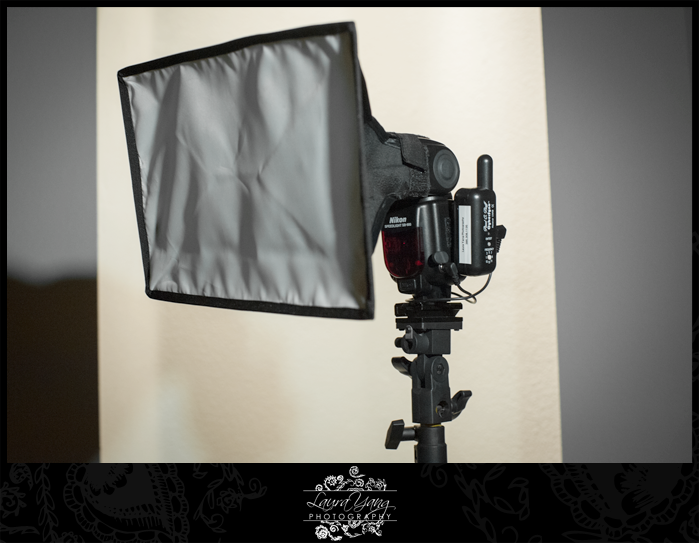
Our third light, which is the primary light source on our subjects, is a Nikon SB900 mounted on a Denny EZ Light Stand (The EZ stand’s legs collapse automatically when its picked up — key for moving around with the stand). We diffuse the SB900’s light with a 12-inch Fotodiox softbox, which simply Velcros over the front of the speed light.
Like we said — simple, right?
But we’re not quite finished, because off-camera lights usually require one more tool — a way to trigger them. Our triggers are Paul C. Buff CyberSyncs, which we love. Both kickers and our main light are all outfitted with CyberSync CSRB receivers, which we Velcro to the side of each light. A CyberSync CST transmitter goes in the hotshoe of each of our cameras, allowing us both to trigger all three lights each time we press the shutter.
Here’s a peek at our gear (minus the LumoPros, which didn’t quite make it into the picture. . . .)


So that’s what we use. Now let’s talk about how we use it.
- We almost always set our kicker lights’ power to 1/32 — we want just enough light to get starbursts; too much power results in blobs of light rather than stars, and too little light doesn’t provide enough backlight.
- With our cameras in manual mode and making sure that we will remain below our max sync speed (of 1/250 on our D700s — the max sync speed varies on different camera models), we meter in-camera until the ambient light is two stops underexposed. This makes the background visible but slightly darker so our subject stands out.
- Keeping the primary light a constant six to eight feet from our subject, we take test shots on each other and adjust the primary light’s power until the red channel on our cameras’ histograms just barely meets the right side of the graph. This ensures the subject’s skin is properly exposed and that we’re not losing any skin detail by overexposing. For the rest of the night, the primary light stays as close to 6-8 feet from the subject as possible.
- We compose our images so that the kicker lights provide either flare or rimlight on our subjects, adding separation and interest to the photographs.
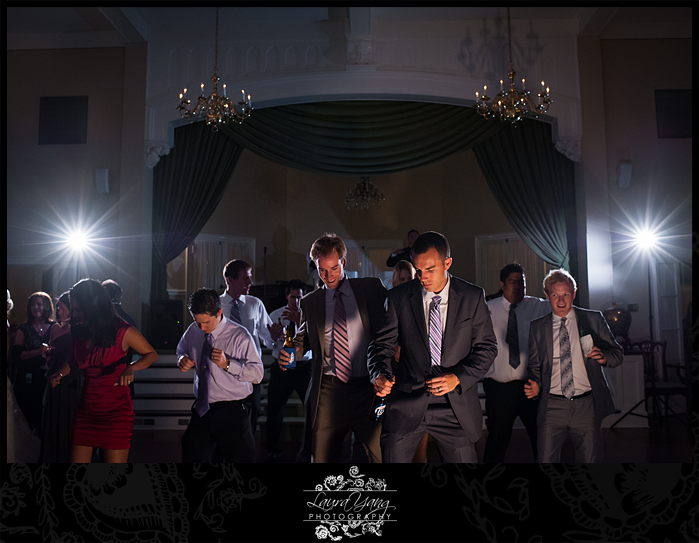
- We position the primary light at portrait lighting, 45-degree, and split lighting angles to illuminate our subject’s face, depending on the situation and mood. Dynamic photos are composed of highlights and shadows, and this is especially true when it comes to subject’s faces. With that in mind, during receptions, Laura usually does most of the shooting, while Danny moves the primary light to constantly provide dynamic lighting angles on the subject. Occasionally for a more dramatic look, Danny will swing all the way over to the side of the subject for split lighting, or he’ll flip the light stand upside down so the light originates near the floor and illuminates upward. Check out the picture below for one of our favorite examples.

35mm f/1.4G, 1/200 sec @ f/5.6, ISO 2500
Another reason we love this lighting setup is because of how versatile it is — it makes it really easy to get beautiful portraits when a bride wants a quick shot with some friends, and it makes table shots a cinch.
We know this barely scratches the surface, but it’s already a lot of information, so we’re going to stop here this week. But we hope that, whether you think this lighting setup is for you or not, you’ll keep working to hone your reception lighting until you’re producing the photographs you want.
~ Laura + Danny
perfect 🙂
i like it
Love this blog post! Thanks for the information!
With having your main light off camera with the soft box, I assume that is in place of an external flash on your camera??
Also I have always wondered how this works with a second shooter? I considered having one off camera flash and the external flash on camera or the main light like you but any suggestion when working with another photographer at the reception?
Thanks!
[…] blog post doesn’t even begin to address reception lighting, but we’ve touched on that before and definitely will again in the near future (because the way we light receptions has evolved even […]
Thank you for the kind words, Chapel. We don’t often shoot “light’s up”, but there are times when it does add effect.
Great, Sarah! We’re so glad to hear that our blog posts are helpful!
This is SO refreshing! I just googled something completely unrelated and was lead to your blog! Funny how that happens, because now I am lost reading all your photog tips. I shoot with a Nikon D700 as well and have been trying different lighting situations out a receptions. THANK YOU for this!
I actually really really liked that last picture it has a pretty interesting effect.
Thanks, Andrea! In that first picture, our primary light (the one with the mini softbox) was actually just outside of the frame to camera left at our preferred distance of 6-8 feet from the subjects. You can see one leg of the stand if you look closely at the left side of the picture. The primary light is what illuminated the bride’s face and chest and the back left side of her father’s face. The key is to make sure the ambient is set so that the kickers don’t need to provide too much of the illumination; you want them to mostly provide some beautiful highlights and rim lighting. I hope this works well for you!
Great post! I’m always looking for new ways to make the most of reception lighting. I will definitely try this method out.
In your first pic, is it the kicker lights providing most of the illumination? Given the direction of the shadows cast, I don’t see how there could’ve been any other light on the couple. Am I right?