Note: Photographers’ Friday is a weekly blog series directed toward professional photographers, and in some instances, serious amateur photographers. All Photographers’ Friday blog posts will assume that readers have a basic working knowledge of digital SLR cameras, but if you’re left with questions or don’t understand any of the information, don’t hesitate to ask. We love e-mails!
—
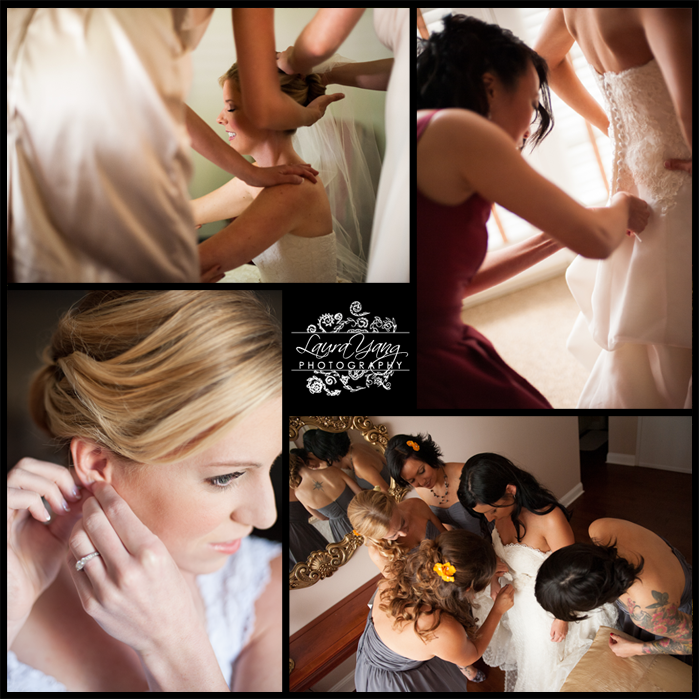
Whenever I’m talking with a bride about the morning of her wedding, I give her a warning: If there are windows in the room where she and her bridesmaids are getting ready, I will be turning off all the lights in the room, and we’ll be shooting with 100% pure natural goodness, by which I mean window light.
There is a huge, huge difference in image quality when you photograph under flourescent, tungsten, or mixed light (the worst!) versus letting the light pouring in through a window do all your illuminating for you. I mean, seriously, when it comes to photographing brides getting ready, you can’t ask for light much more divine than this. So, here’s how to make it work: Turn off the lights in the room. Even if it’s a bit dark, trust me — you will love the results if you just bump your ISO a bit and shoot at a wide aperture. Just make sure your shutter speed doesn’t get too slow to capture the action.
Then position your bride about 6-8 feet from the window. This is the ideal distance, keeping the light bright enough to illuminate her, but giving the light enough distance to disperse softly across her. Turn the bride so she — or her back, if you’re getting shots of the gown being laced up, or her leg if you’re getting a shot of the garter — is facing toward the window. She doesn’t need to be turned fully into the light; if the light is directional on your bride, at a 30-45 degree angle, that is perfect. Any time you can place the bride near natural reflective surfaces in the room — light colored walls, light carpet or tile, a light bedspread, even a mirror — to bounce more light onto her, you’ll get a beautiful result. Just be mindful of color casts: You don’t want to position your bride in white right next to a bright green wall, or her whole gown will be tinted.
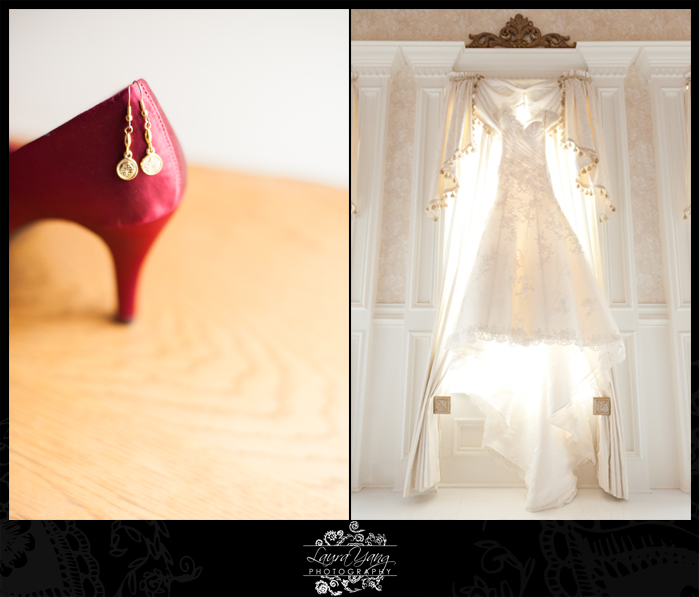
Window light is a huge asset for photographing your bride’s details, too. There are two main ways to use window light to photograph details. The picture on the left was taken shooting away from the window, letting the light spill over the bride’s shoe and earrings. The picture on the right uses the window as a frame, backlighting the bride’s gown. We try to do a mixture of both types of shots at every wedding where we photograph the bride’s details inside.
When you’re photographing details in window light, it’s often difficult to move them a full 6-8 feet away from the source of the light. In my example, the window was only about 18 inches away from the scarlet shoes. That’s perfectly fine, as long as you don’t overexpose the subject too much and blow out your highlights. The only other thing you will really want to avoid is shooting the details in harsh, direct sunlight, if the window faces toward the sun.
If you can turn each detail so the light is at an angle — yes, that 30-45 degree angle again — you’ll see pleasing shadow and depth in your image. See how the light drops off into shadow along the shoe’s instep? Highlight and shadow make images far more interesting, I believe, so play with turning the details in different directions to the light in addition to photographing them from different angles, and find what looks just right to you.
When you’re photographing details in a window, it is time to overexpose your subject, to compensate for the strong backlighting, but don’t just trust your camera’s LCD screen to see when the subject of your photo looks bright enough. If you do that, chances are you’ll blow out the background so far that the results won’t be very pleasing. To compensate for that, one thing we’ve been doing recently with both portraits and details, with great success, is leaving the exposure a bit darker than we want it in the final image, then using the shadows slider in Lightroom 4 to brighten some of the shadows. That will allow you to not overexpose the background, in this case the window, too much, and will still allow you to capture the detail in the gown, or whatever you’re photographing. That’s all for today! Have a great weekend, everyone, whether you’re shooting weddings or family sessions or prepping for Thanksgiving!
~ Laura
Be the first to comment